Getting started
Getting started
From sign-up to a finished, published profile page in just a few minutes – your complete roadmap for getting started.
Welcome to profilo! Here you'll build a personal profile page at profilo.so/yourname in just a few minutes – a clean bento-tile page with your links, résumé, projects and everything that's part of you. This page is your starting point: it walks you through the whole journey once, from sign-up to going live. Each step links to a detailed article in case you want to dig deeper.
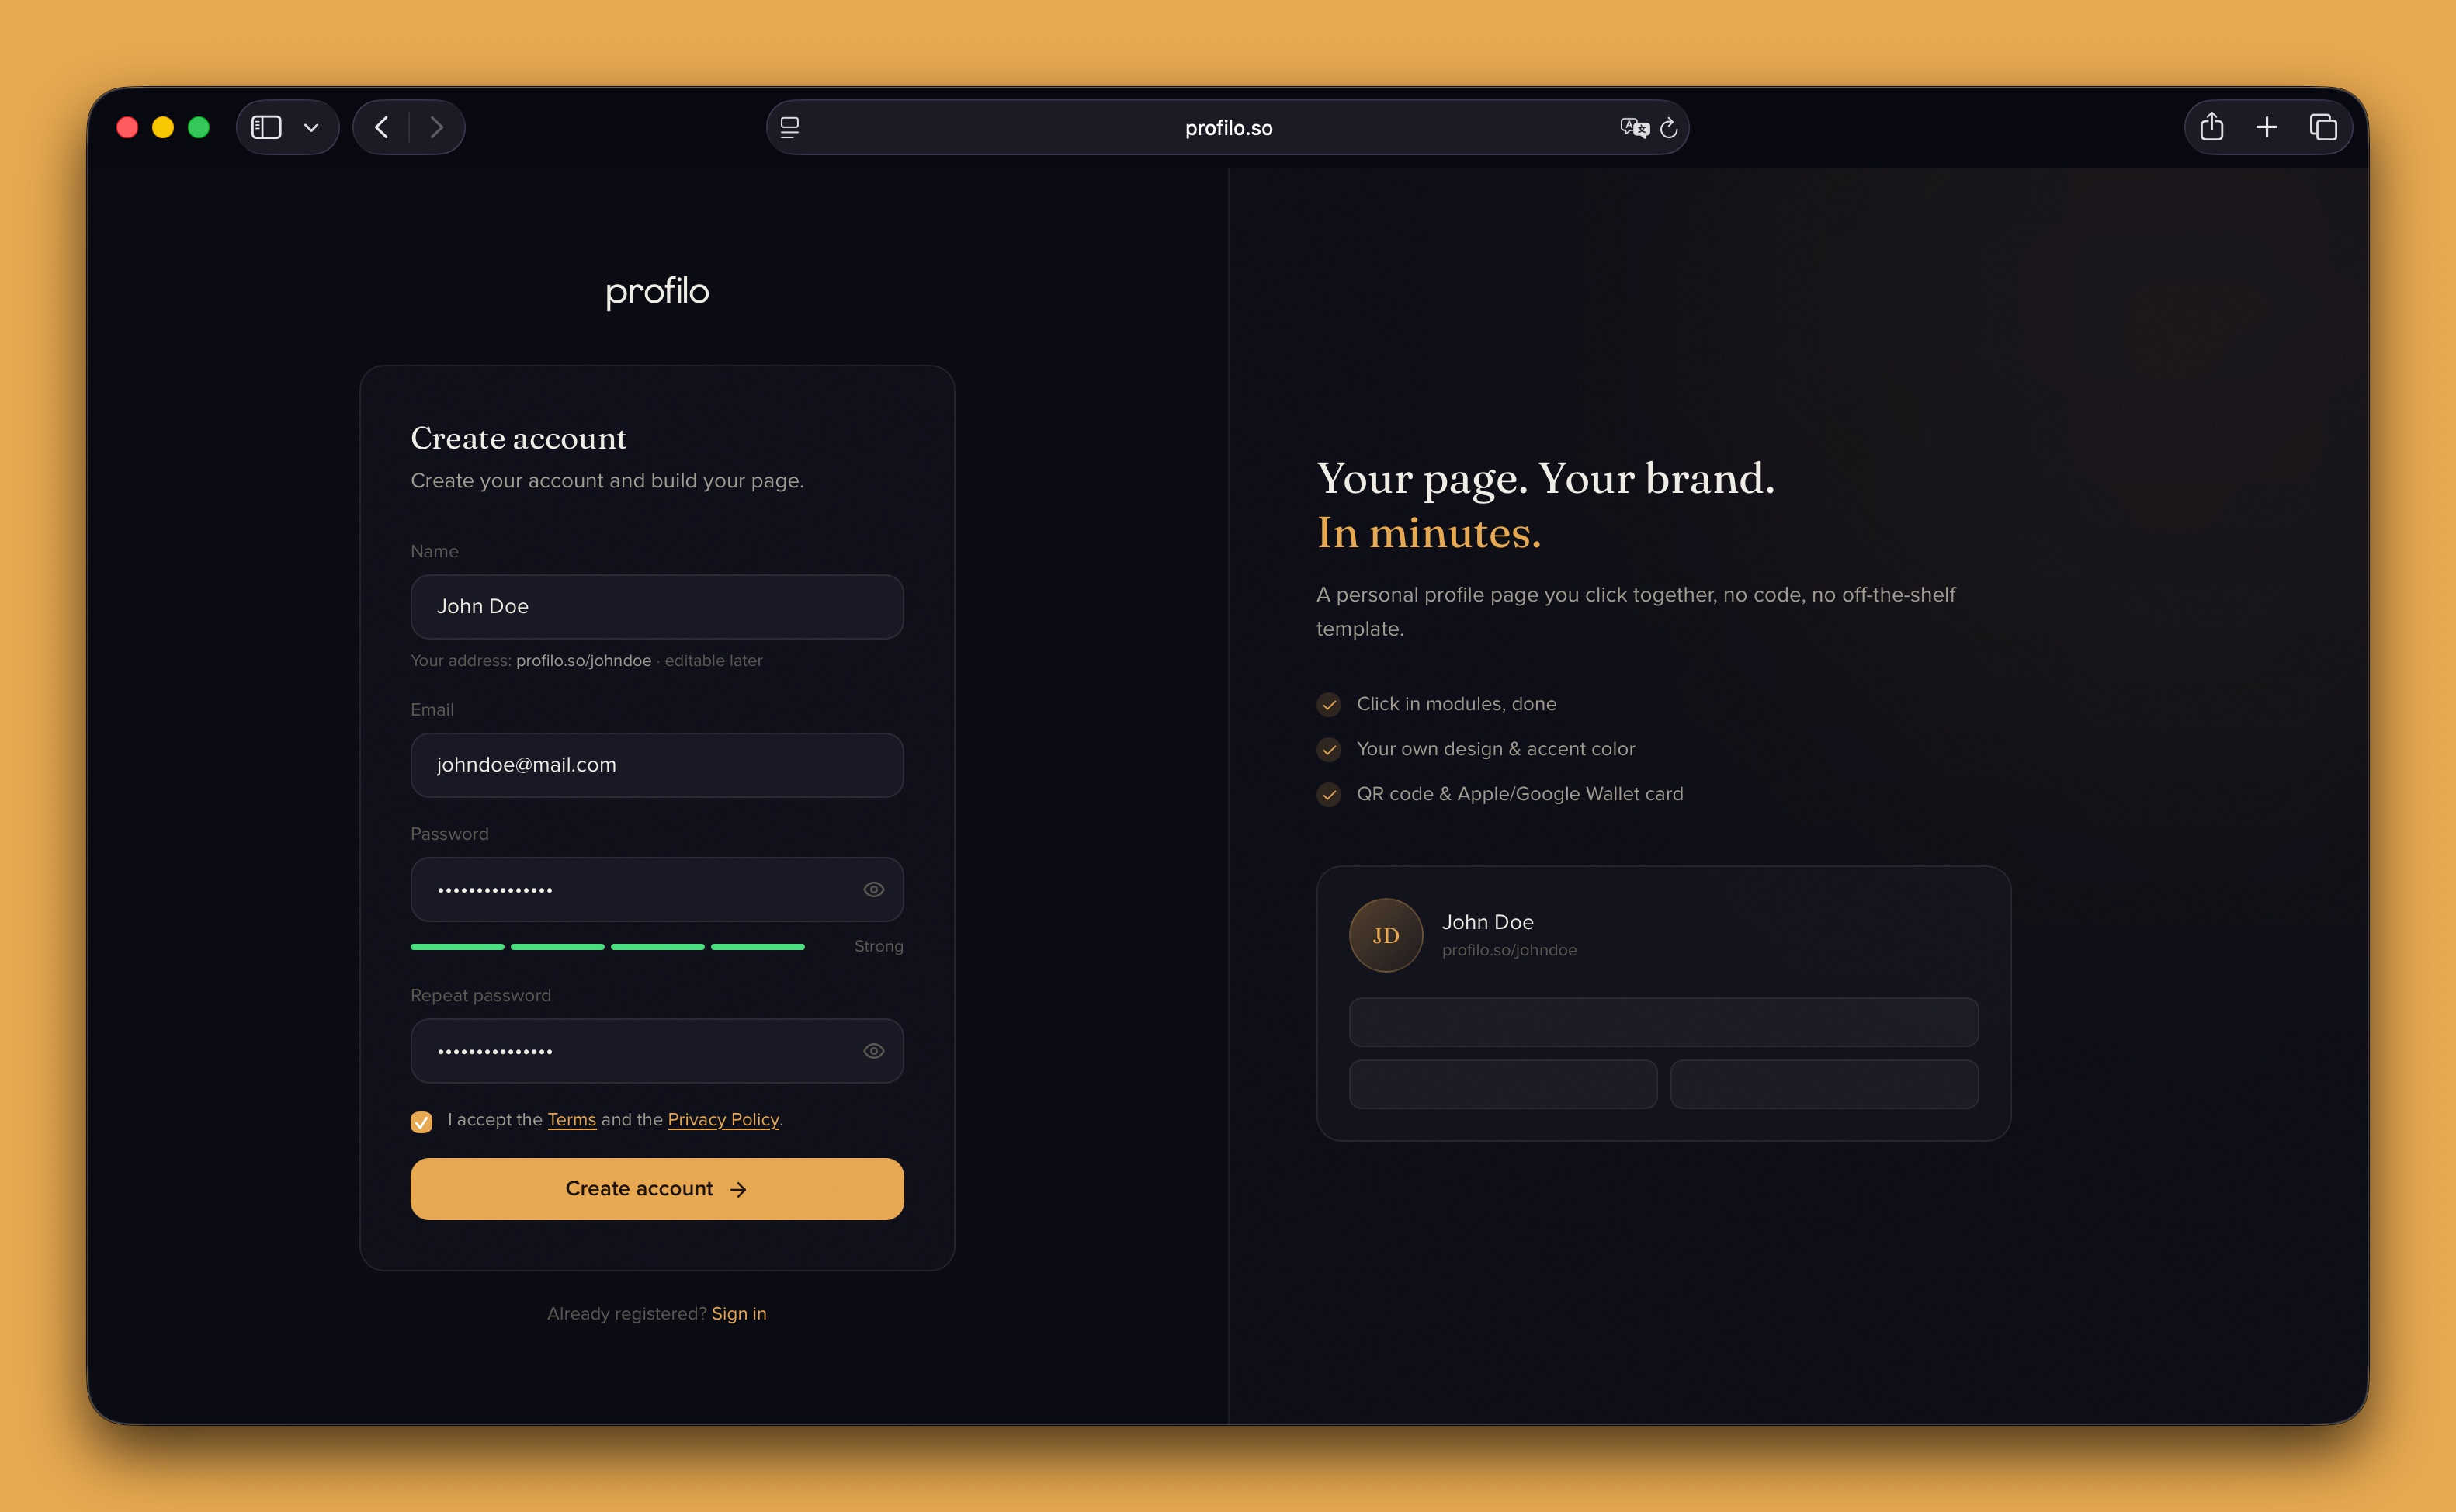
1. Create an account
- On the landing page, click Try it free (in the top navigation, the hero, or the pricing section).
- Enter your name. As you type, a live preview shows your future address
profilo.so/yourname– you can change this later. - Add your email and a password (at least 6 characters; the eye icon reveals the password, the strength meter ranges from Weak to Strong) and repeat it under Repeat password.
- Tick the box I accept the Terms and the Privacy Policy.
- Click Create account.
Sign-up works with email and password – there's no login via Google or other services.
After that you'll see a Almost there! message: we send you a confirmation email. Open it and click the link to activate your account – then you'll land straight in your dashboard.
Note: No email in your inbox? Check your spam folder or click Resend confirmation email.
2. Arrive in the dashboard
Once confirmed, you'll land on the Overview – your control center. Here you see at a glance:
- the Status card (e.g. Draft, Live or Offline), which tells you whether your page is publicly reachable,
- the share center with your link
profilo.so/yournameto copy and view, - the quick actions with the big Edit profile button.
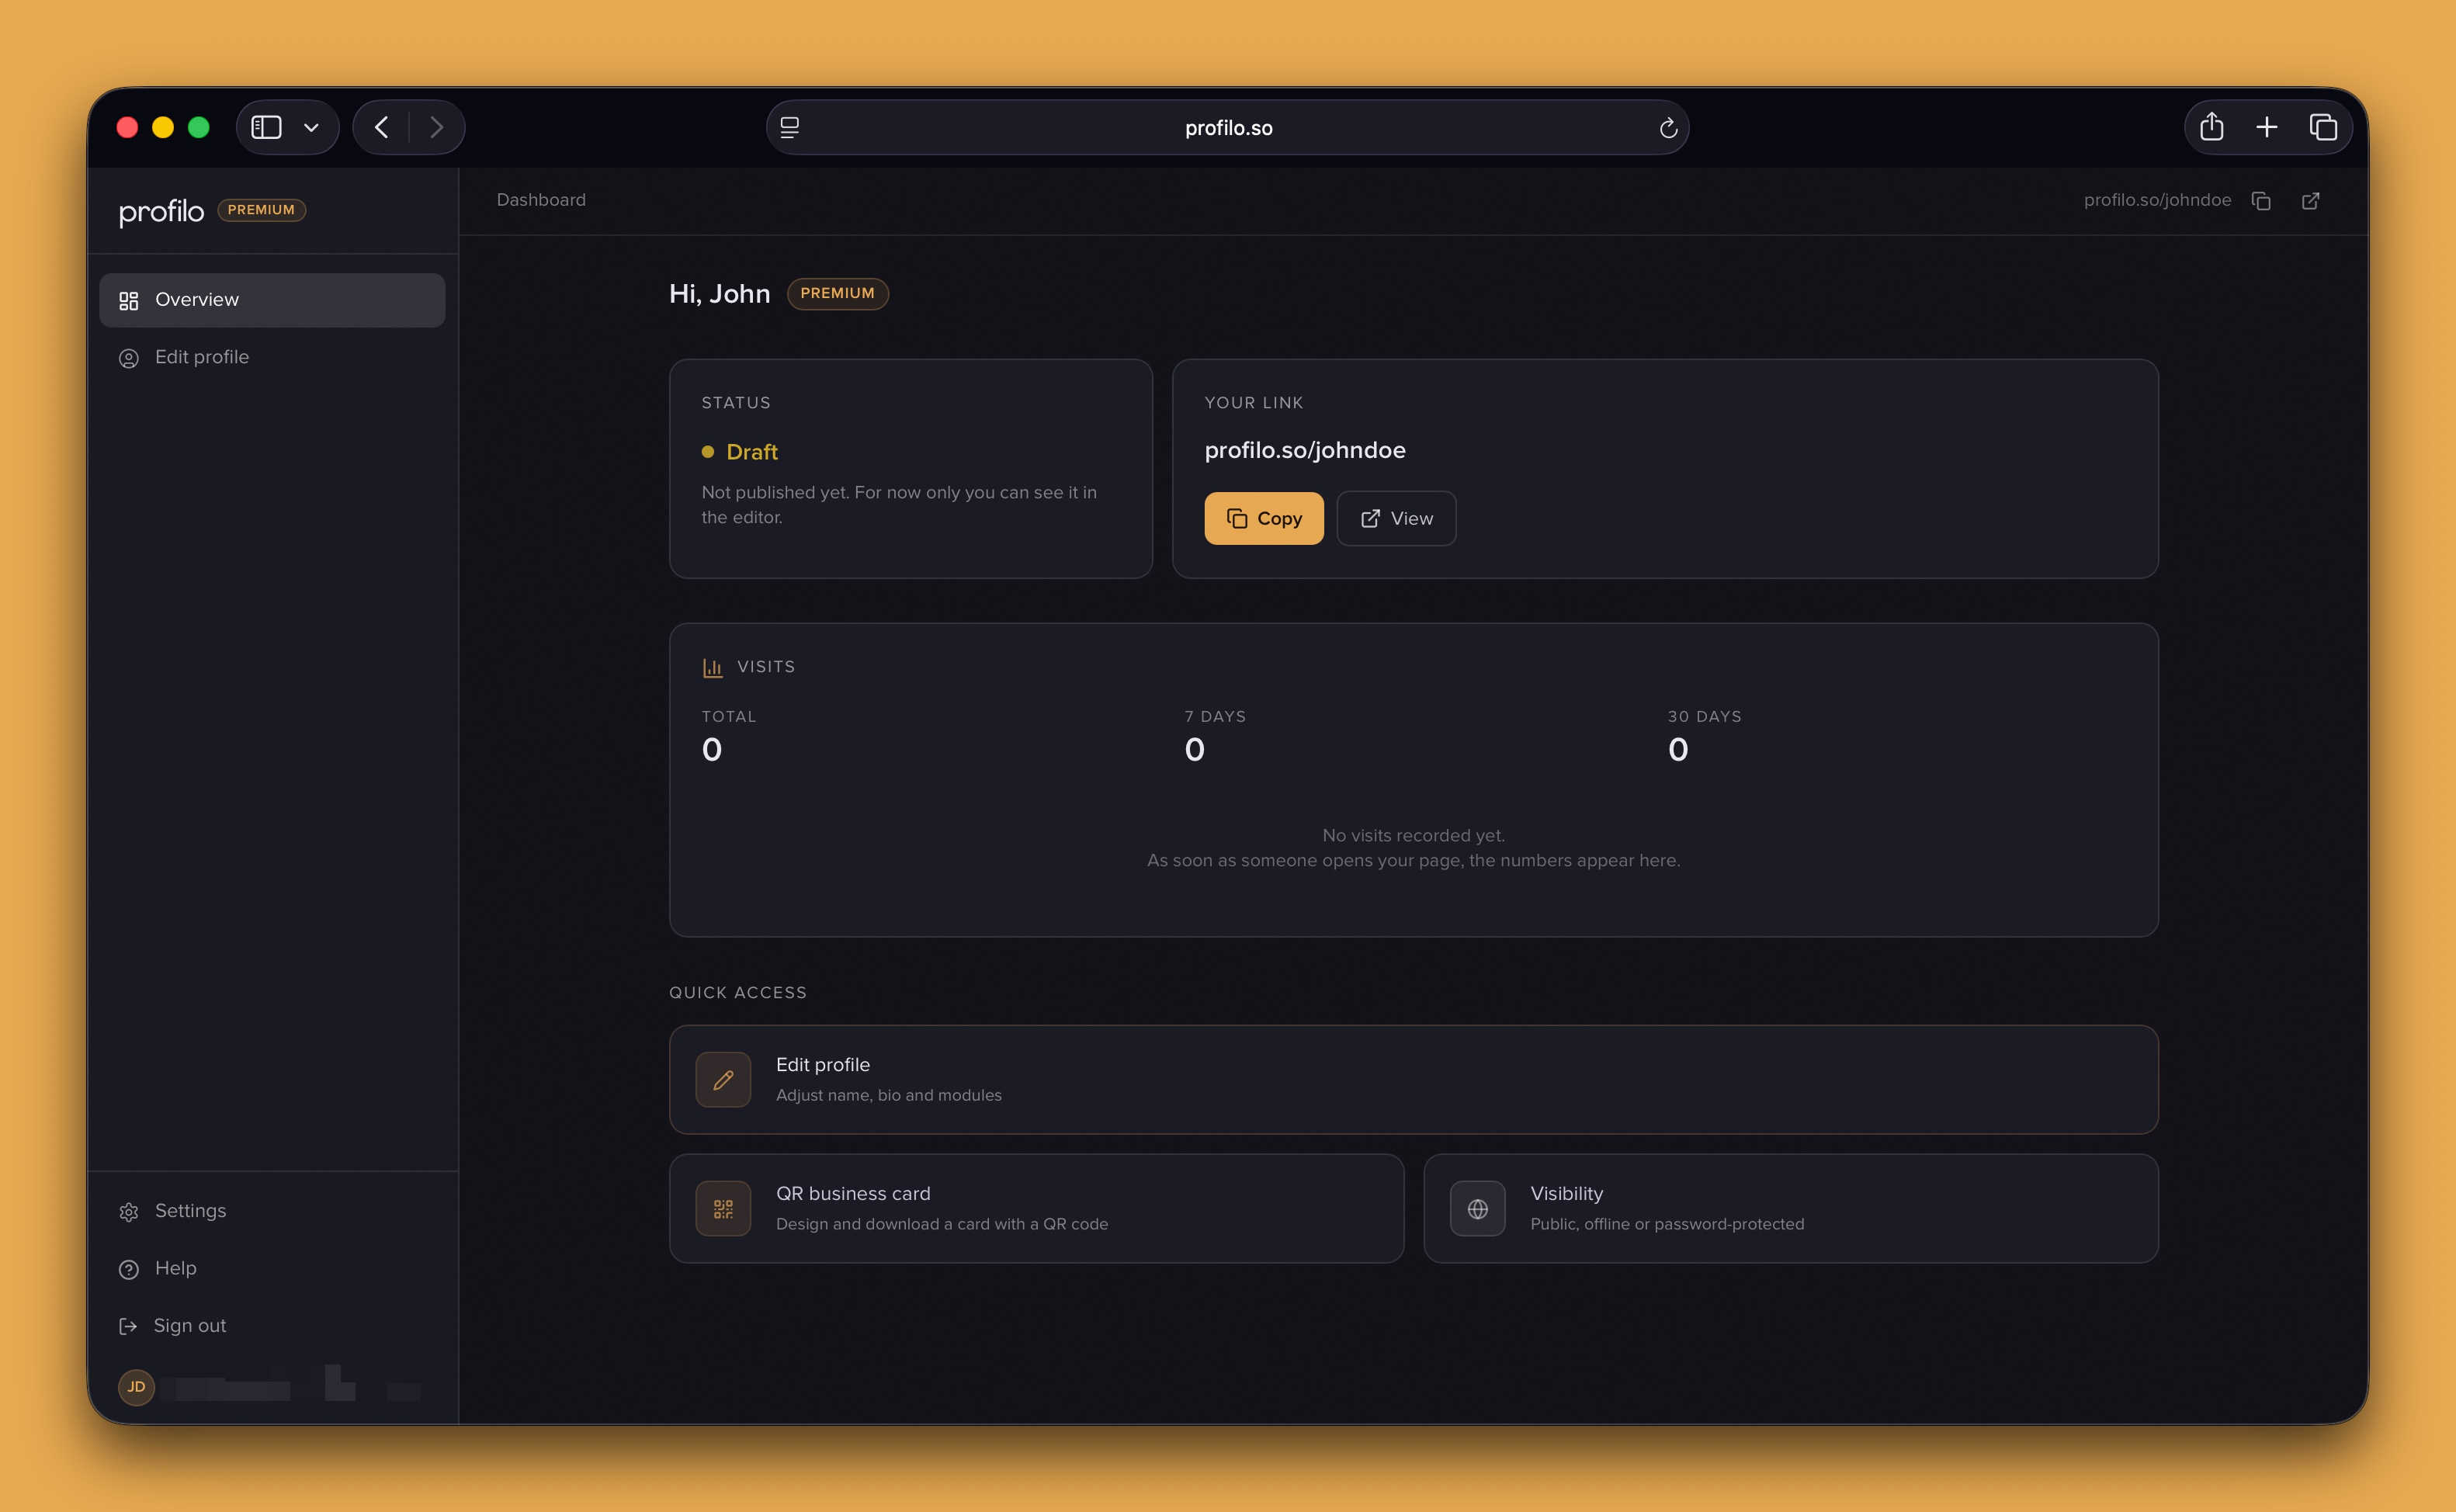
On your very first visit, a short tour starts automatically and explains these areas. Click through it with Next or skip it – whatever you prefer.
3. Fill your profile
Your page starts completely empty – there are three ways to fill it. Just pick the one that suits you best:
- Fastest: Upload your résumé as a PDF, and the AI automatically builds matching modules from it (experience, education, skills and more). Learn more under CV import.
- With a template: In the editor, click Templates and pick a ready-made layout – the tiles are already sensibly arranged, you just fill in your content. See Templates.
- From scratch: Add individual modules via Add and arrange them by drag & drop. All the details in Building your profile.
Tip: These paths aren't mutually exclusive. Many people start with the CV import or a template and then add individual modules by hand.
4. Customize the design
Use Design to make the page yours: light or dark, accent color, style (e.g. Glass) and corner rounding. That's how the look becomes you and your brand. More under Design & themes.
5. Publish
One click on Publish makes your page public at profilo.so/yourname. Beforehand you can use Preview to see it exactly as visitors will, and Save to keep your draft without going live. Everything about it under Publishing & going live.
Tip: Nothing is public until you click Publish. So you can experiment in peace – only that deliberate click makes your page live.
That's it – welcome aboard. If you get stuck, the FAQ will surely help.
Related articles
Build your profile: add, arrange & fill modules
How to add modules, fill them with content and arrange your profile page with drag & drop — the complete editor workflow.
Build your profile from your résumé
Upload your CV or LinkedIn profile as a PDF — profilo reads it with AI and fills the matching modules automatically.
Publish & go live
How to make your profilo public — the difference between Save, Preview and Publish, explained simply.